
 |
ROLEXROLEXROLEXROLEXROLEXROLEX
 ROLEXROLEXROLEXROLEXROLEXROLEX
|
|
#1 |
|
"TRF" Member
Join Date: Oct 2009
Location: Here and there
Posts: 12,485
|
hi guys
As we're getting more 5167 owners among us I thought it would be useful with a few snaps showing how easy it is to resize the strap - no need to get an AD to do this for you here's what you need
picture of the tools 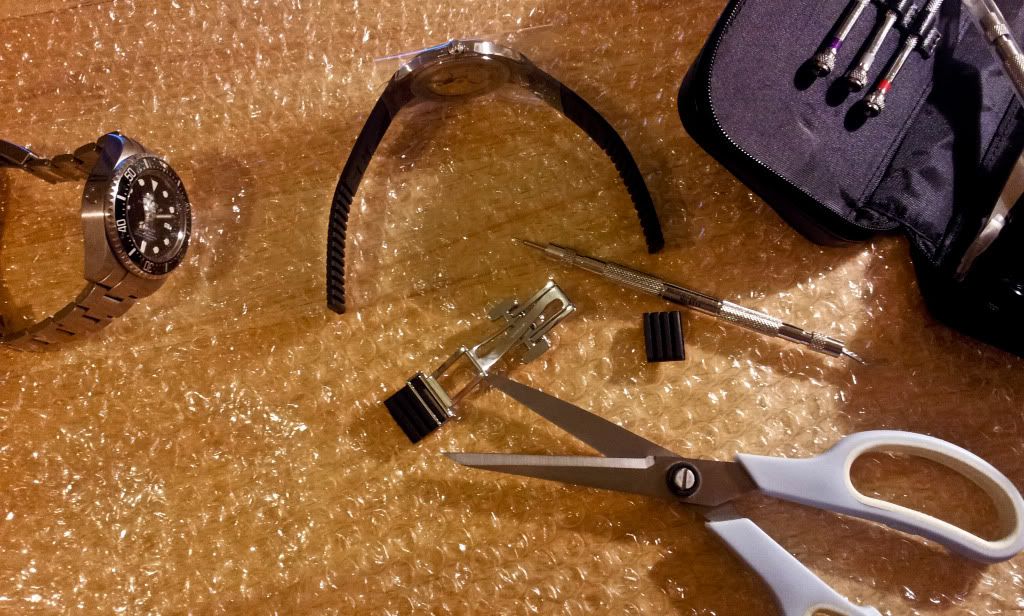 steps 1. remove buckle from the strap ends 2. cut one slot from each side 3. fit buckle back on - this I found important as it gives a good indication of how many slots need to be cut off. if you're sure about the fit you can of course cut off more than one but better to play it safe* 4. repeat step two and three until you get a fit where you can stick a couple of fingers between the buckle and your wrist*. BUT bear in mind to leave slots on the 12 o'clock side so you balance the watch *DO NOT cut too many slots as you need to cater for fat wrists in the summer. cutting too many slots and you're likely to have to fork out $250 on a new strap if you can't live with a tight fit NOTE: as the 5167 is so light it's better to resize too loose than too tight. even it it's dangling on your wrist in the winter you won't notice it's there as it's so light. too tight and you know the pain here's mine. resized so it's perfect for winter as well as summer summer 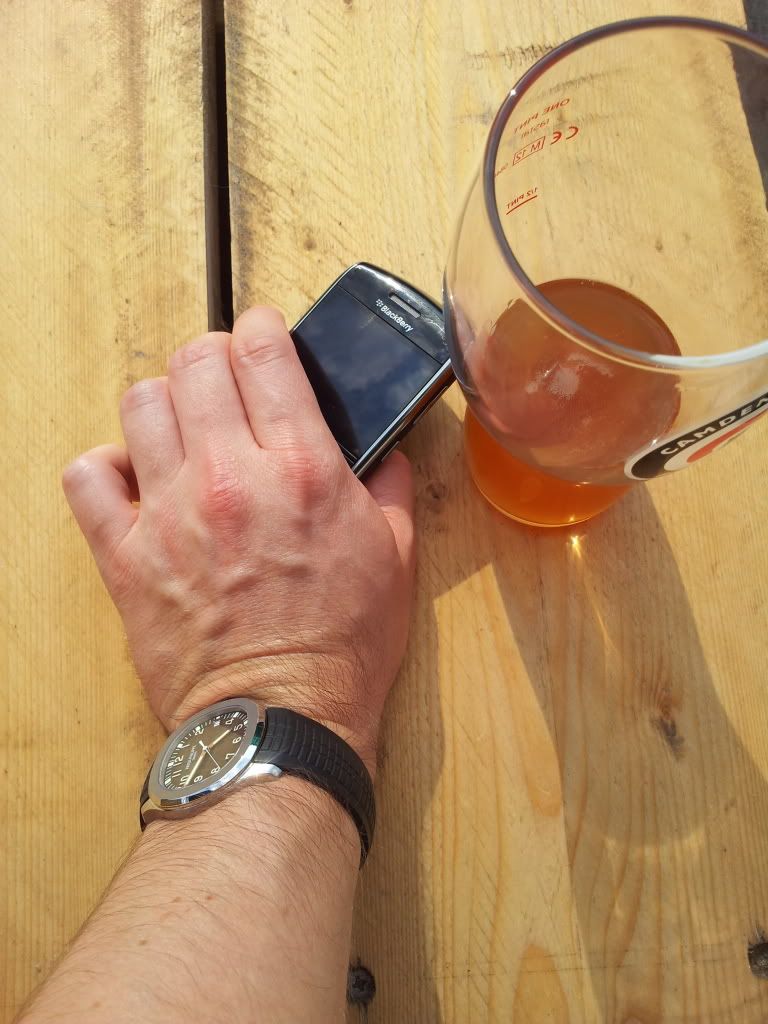 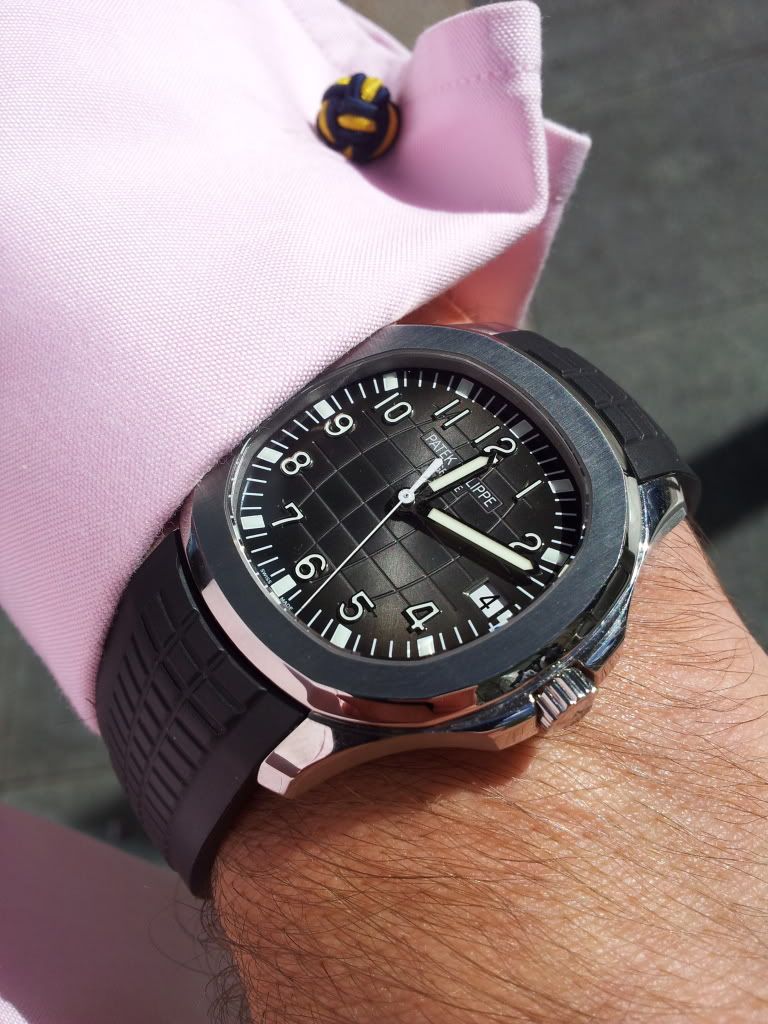 winter 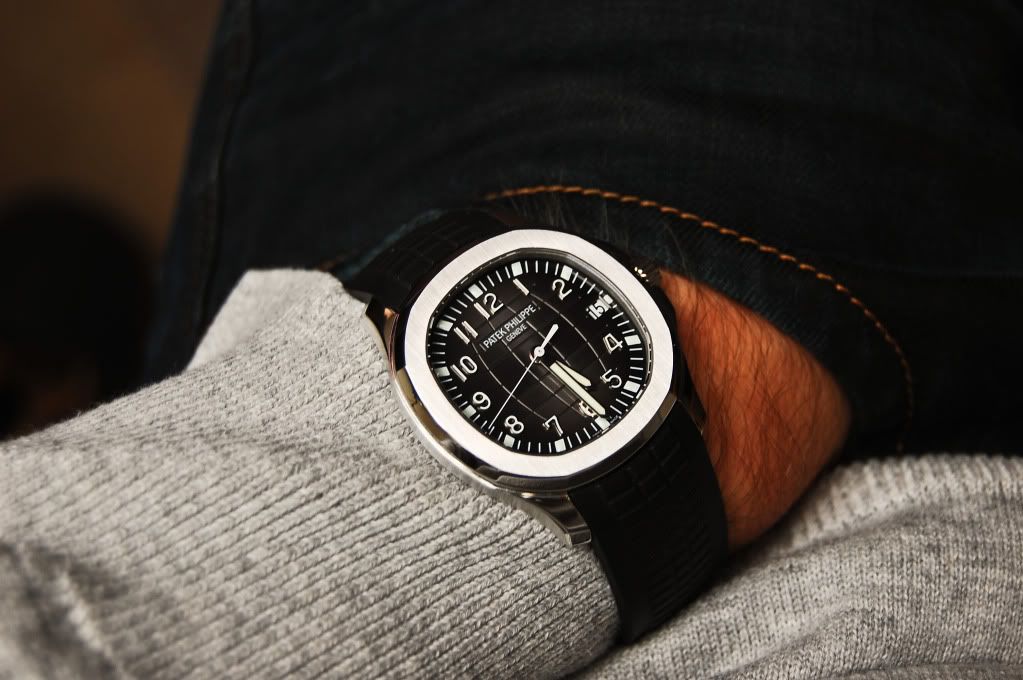 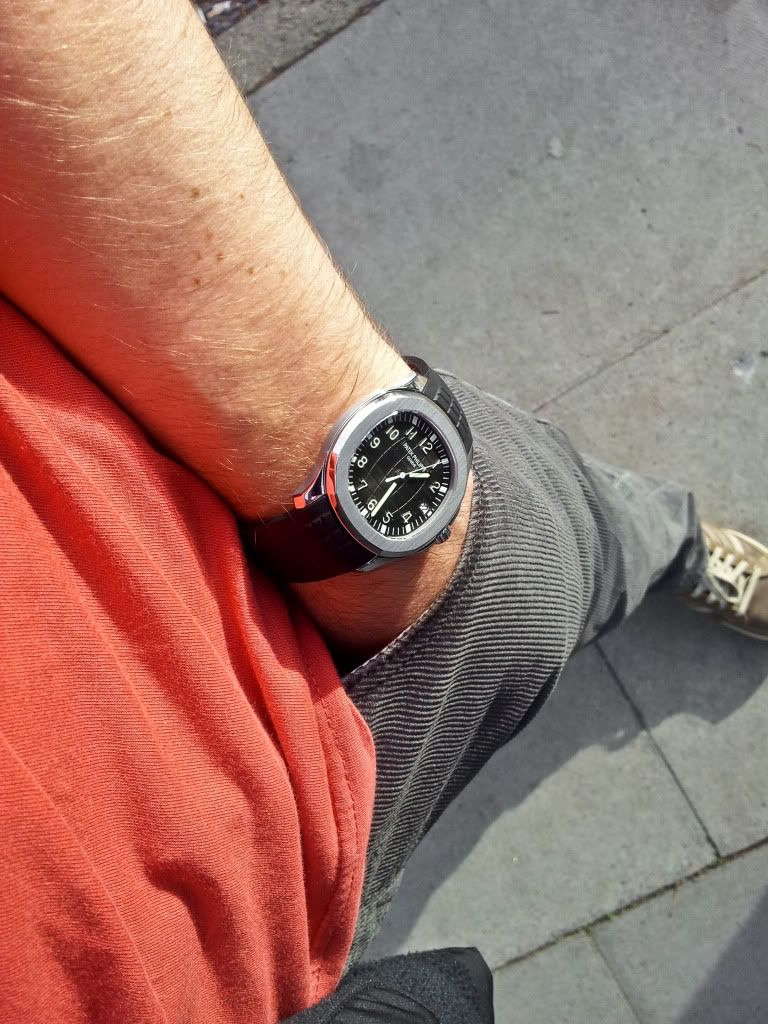
__________________
Fine Quality is Long Remembered After the Pain of Spending Money is Forgotten |
|
|

|
|
|
#2 |
|
"TRF" Member
Join Date: May 2010
Real Name: Dan
Location: USA
Watch: This N That
Posts: 34,251
|
Also remember:
Your more than likely to have to cut a little more strap from one side than the other to get the position of the watch head correctly on the wrist. The springbar tool will help you stick the rubber strap back into the deployant clasp when it comes time. It's almost impossible to do so otherwise. Great tutorial. 
__________________
When it captures your imagination, that's when you know you have found your passion. Loyal Foot Soldier of The Nylon Nation. Card Carrying Member of the Global Association of Retro-Grouch-Curmudgeons |
|
|

|
|
|
#3 |
|
"TRF" Member
Join Date: Sep 2011
Real Name: Carl
Location: Always moving
Watch: If you wish...
Posts: 22,039
|
Okay so I got the scissors, all I need is a springbar tool...and a 5167!
 In all seriousness, that's a very nice tutorial and I am sure a lot of people will find it very useful, thank you Anders! 
__________________
Mon corps c'est un pays en guerre sur l'point d'finir, Le général de l'armée de terre s'attend au pire, J'ai faim, j'ai frette, je suis trop faible pour me lever debout, On va hisser le drapeau blanc un point c'est tout. - André Fortin |
|
|

|
|
|
#4 |
|
2024 ROLEX SUBMARINER 41 Pledge Member
Join Date: Mar 2010
Location: Paris, France
Posts: 35,188
|
so, i guess the bubble wrap is optional?
 nice one, anders. some day i'd love to be in the position to actually put this tutorial to use. 
|
|
|

|
|
|
#5 |
|
Member
Join Date: Jun 2012
Real Name: Michael
Location: Singapore
Watch: AP, PP, Rolex
Posts: 33
|
Same here... can't wait till that day comes around!
More important question though - Puffy, how do you 'handle' switching from the DSSD to the low profile/feather weight of the Aquanaut? |
|
|

|
|
|
#6 | |
|
"TRF" Member
Join Date: Oct 2009
Location: Here and there
Posts: 12,485
|
Quote:

__________________
Fine Quality is Long Remembered After the Pain of Spending Money is Forgotten |
|
|
|

|
|
|
#7 |
|
"TRF" Member
Join Date: Feb 2009
Real Name: TSW
Location: Le Brassus
Watch: Rolex & AP's
Posts: 27,449
|
Looks very tricky
 
__________________
 AP Owners Club IG @swiss.watch.connection |
|
|

|
|
|
#8 |
|
"TRF" Member
Join Date: Feb 2010
Real Name: Joe
Location: PA
Posts: 14,774
|
Great job!
 Thanks for sharing. Thanks for sharing.
|
|
|

|
|
|
#9 |
|
2024 Pledge Member
Join Date: Oct 2009
Location: Hawaiian islands
Posts: 1,109
|
Great tutorial Puffy. The only suggestion I'd make is to use a single edge razor instead of scissors. Carefully align and then rest the edge of the blade perpendicular against the segment you wish to cut. Then use evenly applied pressure straight down to "chop" segments off as needed. This way you get a clean, square cut that's parallel to the strap ridges.
Just my two cents after destroying at least one perfectly good A'naut strap! LOL! Cheers! 
|
|
|

|
|
|
#10 | |
|
"TRF" Member
Join Date: Oct 2009
Location: Here and there
Posts: 12,485
|
Quote:
 a stanley knife against a ruler would also work very wel
__________________
Fine Quality is Long Remembered After the Pain of Spending Money is Forgotten |
|
|
|

|
|
|
#11 |
|
"TRF" Member
Join Date: Sep 2012
Location: TRF
Posts: 721
|
I bet we can use this method for all other watches as well such as my Cvstos rubber straps! Thanks for sharing!
|
|
|

|
|
|
#12 | |
|
2024 ROLEX SUBMARINER 41 Pledge Member
Join Date: Apr 2011
Real Name: DB
Location: :noitacoL
Watch: :hctaW
Posts: 6,700
|
Quote:
 x2 x2
__________________
Lorem ipsum dolor sit amet, consectetur adipiscing elit. |
|
|
|

|
|
|
#13 | |
|
"TRF" Member
Join Date: Jan 2011
Real Name: gus
Location: East Coast
Watch: APK & sometimes Y
Posts: 26,417
|
Quote:
 nice tutorial. once again find myself hovering around the 5167 threads   thanks Anders 
__________________

|
|
|
|

|
|
|
#14 |
|
"TRF" Member
Join Date: Aug 2011
Real Name: Martin
Location: NY And FLA
Watch: AP ROO Blue Scuba
Posts: 2,695
|
Awesome tutorial, what a beauty
|
|
|

|
|
|
#15 |
|
Banned
Join Date: May 2010
Location: pa
Watch: GMT master II
Posts: 600
|
looks sweet.
|
|
|

|
|
|
#16 |
|
"TRF" Member
Join Date: Apr 2008
Real Name: Eric
Location: Calgary
Posts: 9,595
|
Nice! Thanks!
|
|
|

|
|
|
#17 |
|
Banned
Join Date: Feb 2012
Location: Canada
Posts: 26,846
|

|
|
|

|
|
|
#18 |
|
2024 ROLEX DATEJUST41 Pledge Member
Join Date: Feb 2012
Real Name: Jan
Location: PA
Watch: GMT II
Posts: 1,110
|
Great post Anders, it was very useful tonight when I sized the band myself. And it applies to 5165 as well ;-).
Few remarks about speeding things up a bit. I used two sowing needles to hold the band in while checking the fit of the band after each cut. I did not have patience to re-fit the pins after every cut ;-). I agree that it is important to cut very carefully and take time to check the fit with buckle closed. Remember to put the watch on your wrist after each cut, close the deployant buckle and see how it aligns. If you use needles be careful so they do not fall out or they don't pinch you. Second thing I changed - I used small ice cream bowl (sans ice cream) to keep the pins while adjusting the fit. No need for them to roll off the table. Here is my setup.  And the fit after work is done.  Again Anders great post, thank you for giving me the confidence to cut it myself. |
|
|

|
|
|
#19 |
|
"TRF" Member
Join Date: Oct 2009
Location: Here and there
Posts: 12,485
|
Cool Jan!!
some addtional great tips here!
clearly i'm nowhere near as practical as you, the needles and bowl are great ideas  the 5165 looks great on you!
__________________
Fine Quality is Long Remembered After the Pain of Spending Money is Forgotten |
|
|

|
|
|
#20 |
|
2024 ROLEX DATEJUST41 Pledge Member
Join Date: Feb 2012
Real Name: Jan
Location: PA
Watch: GMT II
Posts: 1,110
|
Thanks Anders. Yeah kind of got used to bowls after I spent too much time looking for a small screw while doing some work. I love the Aquanaut a lot. Very light and comfortable watch.
|
|
|

|
|
|
#21 |
|
2024 ROLEX SUBMARINER 41 Pledge Member
Join Date: Apr 2011
Real Name: DB
Location: :noitacoL
Watch: :hctaW
Posts: 6,700
|
Great tips!
 Worked like a charm. Worked like a charm.  ImageUploadedByTapatalk 21366382571.383393.jpg ImageUploadedByTapatalk 21366382591.580946.jpg ImageUploadedByTapatalk 21366382610.361421.jpg ImageUploadedByTapatalk 21366382636.450536.jpg
__________________
Lorem ipsum dolor sit amet, consectetur adipiscing elit. |
|
|

|
|
|
#22 |
|
"TRF" Member
Join Date: Apr 2013
Real Name: Tony
Location: Gatchaman
Posts: 1,873
|
This tutorial was very helpful. Thanks
|
|
|

|
|
|
#23 |
|
"TRF" Member
Join Date: Sep 2011
Real Name: Kevin
Location: Somewhere in PA
Watch: All of them...
Posts: 10,355
|
Great three! It just helped me size a 5164! Thank you!
__________________
Patek Philippe Rolex |
|
|

|
|
|
#24 |
|
2024 Pledge Member
Join Date: Oct 2007
Location: U.S
Watch: Rolex, PP, AP, GS
Posts: 5,784
|
Nice details. Thanks for sharing...looks great!!! Now all I need is a 5167 8).
|
|
|

|
|
|
#25 |
|
"TRF" Member
Join Date: Aug 2012
Real Name: jon
Location: Singapore
Watch: ??? Yes please!
Posts: 622
|
Thanks for sharing puffy, your pictures are my poison, really hoping to get an aquanaut as my first Patek.
|
|
|

|
|
|
#26 |
|
"TRF" Member
Join Date: Oct 2013
Location: USA
Watch: Patek, Rolex
Posts: 29
|
That springbar tool looks really handy. I've tried looking for one online but can't seem to find the same one you have Puffy. Mind sharing the make/model?
|
|
|

|
|
|
#27 |
|
"TRF" Member
Join Date: Jan 2011
Real Name: gus
Location: East Coast
Watch: APK & sometimes Y
Posts: 26,417
|
|
|
|

|
|
|
#28 |
|
"TRF" Member
Join Date: Oct 2013
Location: USA
Watch: Patek, Rolex
Posts: 29
|
Found it online Gus and ordered. Thanks!
|
|
|

|
|
|
#30 | |
|
"TRF" Member
Join Date: Jan 2011
Real Name: gus
Location: East Coast
Watch: APK & sometimes Y
Posts: 26,417
|
your welcome
 Quote:
 
|
|
|
|

|
 |
| Tags |
| 5167 , aquanaut , resizing , rubber strap , sizing |
| Currently Active Users Viewing This Thread: 2 (0 members and 2 guests) | |
|
|
*Banners
Of The Month*
This space is provided to horological resources.